Table of Contents
ToggleLow-voltage landscape lighting has transformed from a luxury to a weekend DIY project, but finding the right transformer still trips up many homeowners. A smart landscape lighting transformer doesn’t just supply power, it brings automation, scheduling, and remote control to your outdoor lighting setup. Whether you’re illuminating a pathway, highlighting architectural features, or adding security around the property, a smart transformer gives you precision control over voltage, timing, and energy use without rewiring your entire system.
Key Takeaways
- A smart landscape lighting transformer adds Wi-Fi, app control, and automation to outdoor lighting while stepping down 120-volt power to safe 12 or 24 volts for LED and halogen fixtures.
- Upgrading to a smart transformer can reduce outdoor lighting costs by 20–30% through dimming, scheduling, and precise zone control without rewiring your entire system.
- Match your transformer’s wattage rating to your total fixture load plus 20% headroom, and use multi-tap outputs or a second transformer for wire runs exceeding 100 feet to prevent voltage drop.
- Smart landscape lighting transformer installation requires a GFCI-protected outlet and can be a weekend DIY project for most homeowners, though line-voltage work should be handled by a licensed electrician.
- Monitor voltage regularly at your farthest fixture, keep firmware updated quarterly, and inspect connections annually to maximize performance and prevent dimming, flickering, or device disconnections.
What Is a Smart Landscape Lighting Transformer?
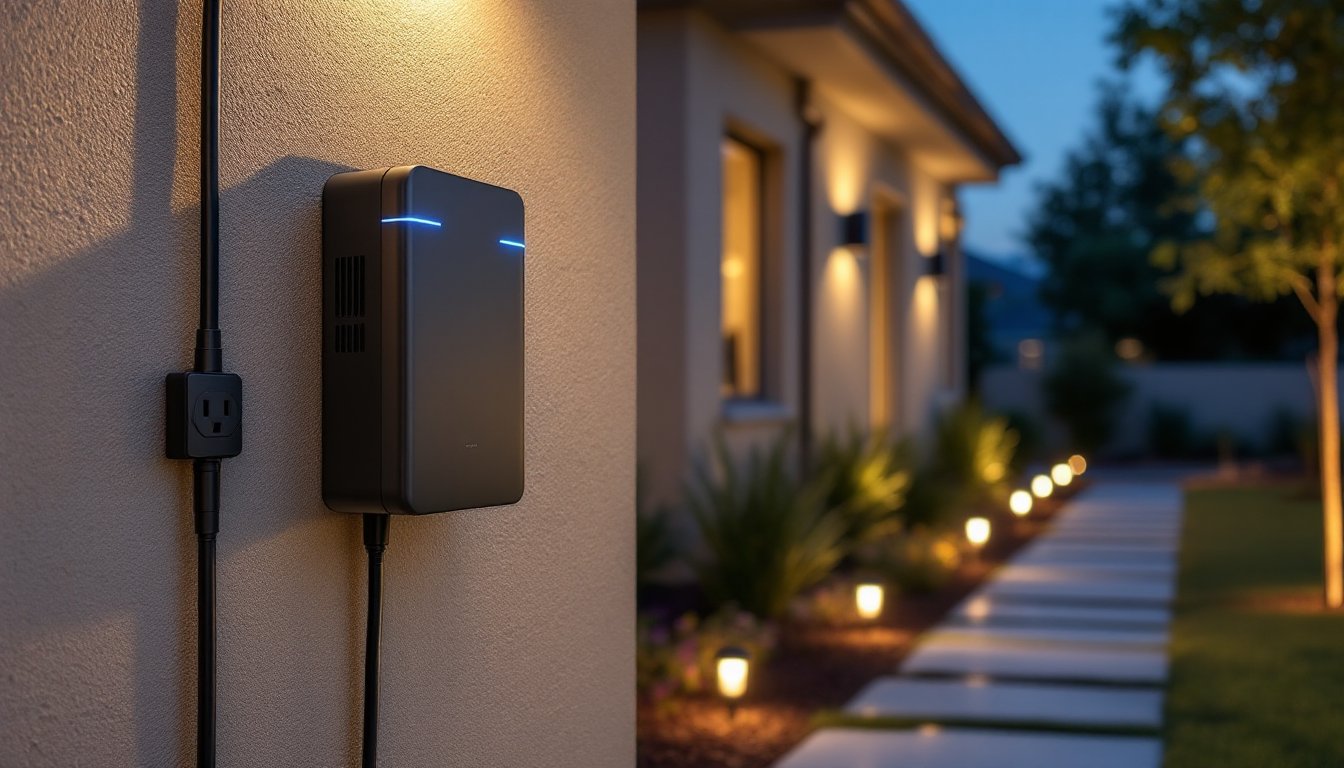
A landscape lighting transformer steps down your home’s 120-volt line power to a safer 12 or 24 volts for outdoor LED or halogen fixtures. Standard transformers are simple devices with a plug, a timer wheel, and output terminals. A smart transformer adds Wi-Fi or Bluetooth connectivity, app-based control, and integration with voice assistants or home automation platforms.
Most smart transformers include programmable schedules, dimming capabilities, and real-time monitoring of wattage draw. This means you can adjust brightness from your phone, sync lights with sunrise and sunset times that shift seasonally, and get alerts if a fixture fails or the system overloads. They’re typically rated between 100 and 600 watts, matching the output of conventional models but with far more flexibility.
Physically, they’re housed in weather-resistant enclosures rated for outdoor use, look for NEMA 3R or higher. They mount to an exterior wall near a GFCI-protected outlet or can be hardwired if local code allows. The low-voltage side connects to landscape wire (usually 12- or 14-gauge multi-strand copper), which runs to fixtures daisy-chained or star-configured depending on layout and voltage drop concerns.
Why Upgrade to a Smart Transformer for Your Outdoor Lighting
If you’re still using a mechanical timer or manual switch, you’re missing out on convenience and efficiency. A smart transformer eliminates the hassle of resetting timers after power outages and automatically adjusts for daylight saving shifts.
Energy savings are measurable. Dimming LEDs by 25% can extend their lifespan by thousands of hours and cut electricity use proportionally. Smart transformers let you dial in exact brightness levels for different zones, brighten pathways for safety, dim accent lights for ambiance. According to reviews on Tom’s Guide, many users report 20–30% reductions in outdoor lighting costs after upgrading.
Security and automation are the bigger draws. Geofencing can turn lights on as you approach home. Vacation modes randomize on/off cycles to mimic occupancy. Integration with motion sensors or cameras creates layered security without adding separate systems. For homeowners already invested in integrated home automation, a smart transformer becomes another controllable node, pair it with door locks, cameras, and thermostats under a single app.
Finally, troubleshooting gets easier. Real-time wattage monitoring flags when a fixture goes out or a wire shorts. Instead of walking the yard with a multimeter at dusk, you’ll get a push notification.
Key Features to Look for in a Smart Landscape Lighting Transformer
Wattage and Power Capacity
Match the transformer’s wattage rating to your total fixture load, then add 20% headroom for safety and future expansion. Calculate load by adding up each fixture’s wattage, most LED landscape lights draw 3–7 watts, older halogens 10–20 watts.
For example, fifteen 5-watt LED path lights (75 watts total) and three 15-watt spotlights (45 watts) sum to 120 watts. A 150-watt transformer would work, but a 200-watt model gives room to add more fixtures later without overloading. Undersizing causes dimming, flickering, and premature transformer failure.
Some smart transformers offer multi-tap outputs (12V, 13V, 14V, 15V). Use higher taps for long wire runs to compensate for voltage drop, fixtures farthest from the transformer see lower voltage due to resistance in the wire. If you’re running wire more than 100 feet, consider a transformer with tap options or plan for dual transformers to split the load.
Smart Home Integration and App Control
Compatibility matters. Look for transformers that support Wi-Fi, Zigbee, or Z-Wave, depending on your existing setup. Wi-Fi models work standalone with their own apps but may clutter your network. Zigbee and Z-Wave integrate with hubs like SmartThings, Hubitat, or Home Assistant, ideal if you’re running smart home automation across multiple devices.
Voice control through Alexa, Google Assistant, or Siri is standard on most 2026 models. You can create routines, “Alexa, backyard party mode” might set lights to 80% brightness and a warm color temperature if your fixtures support tunable white LEDs.
Check the app’s features: scheduling by astronomical clock (sunrise/sunset), zone control for independent dimming of different wire runs, and scene creation. Some apps include energy tracking dashboards that log monthly kWh usage. Firmware updates over-the-air are a plus, manufacturers add features and fix bugs without requiring a new unit.
How to Install a Smart Landscape Lighting Transformer
Safety first: All outdoor electrical work should connect to a GFCI-protected circuit. If you’re not comfortable working with 120-volt wiring, hire a licensed electrician for the line-voltage side. Most jurisdictions require a permit for new outdoor circuits but allow homeowners to replace an existing transformer without one, check local codes.
Tools and materials:
- Smart landscape lighting transformer (matched to your wattage needs)
- 12- or 14-gauge direct-burial landscape wire (length depends on layout)
- Wire nuts or waterproof wire connectors (for low-voltage splices)
- Weatherproof outdoor box or mounting plate (if not included)
- Wire strippers, screwdriver, drill with masonry bit (for mounting)
- Voltage tester and multimeter
- Safety glasses and work gloves
Step-by-step installation:
- Turn off power at the breaker before touching any wiring. Use a voltage tester to confirm the outlet is dead.
- Mount the transformer on an exterior wall near a GFCI outlet, ideally close to the center of your lighting layout to minimize voltage drop. Follow manufacturer specs for clearance, most need 12 inches from the ground and away from sprinkler spray.
- Plug in or hardwire the transformer. If hardwiring, run 120-volt cable through conduit per NEC Article 310 and secure with appropriate connectors. Many smart transformers ship with a weatherproof plug-in cord, simplifying this step.
- Connect low-voltage wiring. Strip wire ends, attach to the transformer’s output terminals (clearly marked + and –), and tighten screws. For long runs, use the higher voltage tap to offset drop. Run wire in shallow trenches (6 inches deep is typical, but check local code, some areas require conduit for any buried wire).
- Wire fixtures in series along the cable using waterproof connectors. Don’t exceed 80% of the transformer’s rated wattage on any single run to avoid overheating.
- Pair with the app. Power on the transformer, download the manufacturer’s app, and follow pairing instructions (usually involves scanning a QR code or pressing a button while the app searches for the device). Connect to your Wi-Fi network and set your location for accurate sunrise/sunset scheduling.
- Test each fixture and use the app’s zone controls to adjust brightness. Walk the layout at night to check for dark spots or overly bright areas. Adjust fixture angles and dimming levels as needed.
If you’re adding the transformer to an existing low-voltage system, measure the wire gauge and confirm it can handle the new load. Undersized wire (16-gauge on a long run with high wattage) will cause significant voltage drop. Upgrading to 12-gauge wire improves performance and is worth the material cost.
Pro tip: Take photos of your wiring before closing up the transformer enclosure. Future you will thank you when troubleshooting.
Top Tips for Maximizing Your Smart Transformer’s Performance
Monitor voltage drop regularly. Even with proper wire sizing, long runs or added fixtures can push voltage below the optimal range (11–12V for most 12V systems). Use a multimeter to check voltage at the farthest fixture. If it’s below 10.8V, either shorten the run, upgrade to heavier wire, or add a second transformer.
Use schedules strategically. Instead of all-night illumination, program lights to turn off after midnight unless motion is detected. This cuts energy use and reduces light pollution. If you’ve already set up smart dimmers indoors, apply the same principles outside, dim lights during late hours for a softer glow.
Keep firmware updated. Manufacturers push updates that improve connectivity, add features, and patch security vulnerabilities. Enable auto-updates if available, or check the app quarterly. According to testing by CNET, outdated firmware is the leading cause of smart device disconnections.
Clean and inspect annually. Dirt, spider webs, and corrosion can accumulate on terminals and fixtures. Once a year, power down, open the transformer enclosure, and inspect connections. Tighten any loose terminals and apply dielectric grease to prevent corrosion. Check fixture lenses for water intrusion, failed seals let moisture in, which shorts LEDs.
Plan for expansion. If you buy a 300-watt transformer and currently use 180 watts, you have room for about five more 7-watt fixtures before hitting 80% capacity. Map future lighting projects (deck uplights, pond accents) and size accordingly. It’s cheaper to buy a larger transformer now than replace it in two years.
Integrate with other smart devices. Pair your transformer with outdoor motion sensors or home automation installation services to create conditional logic: if the security camera detects motion after dark, ramp pathway lights to 100%. If no motion for an hour, drop to 30%. This dynamic control saves energy and enhances security without manual intervention.
Consider color temperature. If your fixtures support tunable white LEDs, use warmer tones (2700K) for entertaining areas and cooler light (4000K) for task zones like grilling areas. Recent updates highlighted by Digital Trends show that circadian-friendly outdoor lighting can improve backyard usability without disrupting neighbors.
Finally, document your setup. Note wire gauge, run lengths, fixture counts per zone, and transformer settings in a simple spreadsheet or the app’s notes section. When you sell the house or hand off maintenance, the next person won’t need to reverse-engineer your work.


