Table of Contents
ToggleOutdoor track lighting has evolved from a purely functional fixture to a versatile design tool that handles everything from security lighting to dramatic accent work. Unlike fixed spotlights or string lights, track systems let homeowners aim, reposition, and reconfigure light heads without rewiring, a huge advantage when you’re lighting irregular architecture, seasonal gardens, or multi-use patios. Whether you’re highlighting a pergola, illuminating a walkway, or washing a stone wall with light, track lighting delivers focused, adjustable coverage that adapts as your needs change.
Key Takeaways
- Outdoor track lighting offers flexible, adjustable coverage that lets you reposition light heads without rewiring, making it ideal for highlighting architectural features, gardens, and patios.
- Choose between line-voltage (120V) systems for high-brightness security lighting or low-voltage (12V/24V) systems for energy-efficient accent work and easier DIY installation.
- Strategic placement under eaves, on pergolas, along fences, and on art walls maximizes the impact of track lighting while layering ambient, task, and accent lighting.
- Ensure all outdoor track lighting fixtures and tracks meet UL 1598 standards and carry an IP65 or higher weather rating to withstand moisture, UV exposure, and temperature swings.
- Follow a step-by-step installation approach starting with careful planning and proper grounding, and always hire a licensed electrician for 120V circuits or if local code requires permits.
- Maintain your track system with quarterly lens cleaning, annual gasket inspections, and prompt LED replacement to preserve performance and curb appeal for years.
What Is Outdoor Track Lighting and Why Choose It?
Outdoor track lighting consists of a linear rail (the track) mounted to a wall, soffit, or overhead structure, along with movable light heads that clip or twist into the track at any point. Power runs through the track itself, so each head draws electricity without individual wiring.
Key advantages:
- Flexibility: Reposition heads along the track as landscaping or furniture changes.
- Targeted lighting: Aim each head independently, ideal for uplighting trees, washing walls, or spotlighting entryways.
- Simplified wiring: One circuit feeds the entire track: no need to run separate home runs for each fixture.
- Modern aesthetics: Low-profile rails and compact LED heads suit contemporary exteriors without the bulk of traditional floodlights.
Track lighting works well for homeowners who want control over their lighting scheme without committing to permanent fixture locations. It’s especially useful on long eaves, covered patios, and art-wall installations where you need multiple adjustable sources from a single run.
Types of Outdoor Track Lighting Systems
Outdoor track systems fall into three main categories, each with distinct mounting, voltage, and fixture compatibility.
Line-Voltage Systems (120V)
These systems run on standard household current and mount directly to junction boxes or surface raceways. Line-voltage tracks handle higher-wattage heads (up to 75W per head in many cases) and work well for security or task lighting where brightness matters. Expect to hire a licensed electrician if you’re tapping into existing outdoor circuits or installing new weatherproof boxes, most jurisdictions require permits for 120V outdoor wiring.
Low-Voltage Systems (12V or 24V)
Low-voltage tracks use a plug-in or hardwired transformer to step down household current. Heads draw less power (typically 3–15W LED), making these systems safer to install and more forgiving if you nick a wire. Many low-voltage kits include everything, track, transformer, and heads, so DIYers can complete the job in an afternoon. Light output is ample for accent work, path lighting, and decorative washes but may fall short for security or task lighting in large yards.
Monorail and Cable Systems
Monorail tracks are rigid or flexible single-conductor rails: cable systems use tensioned stainless-steel wires. Both offer a sleek, minimalist look and work exclusively with low-voltage heads. Installation requires careful tensioning and anchoring, especially on long spans, and fixture selection is more limited. These systems shine in modern or industrial-styled homes where the track itself is part of the design.
Where to Install Outdoor Track Lighting for Maximum Impact
Strategic placement turns a simple track into a lighting workhorse.
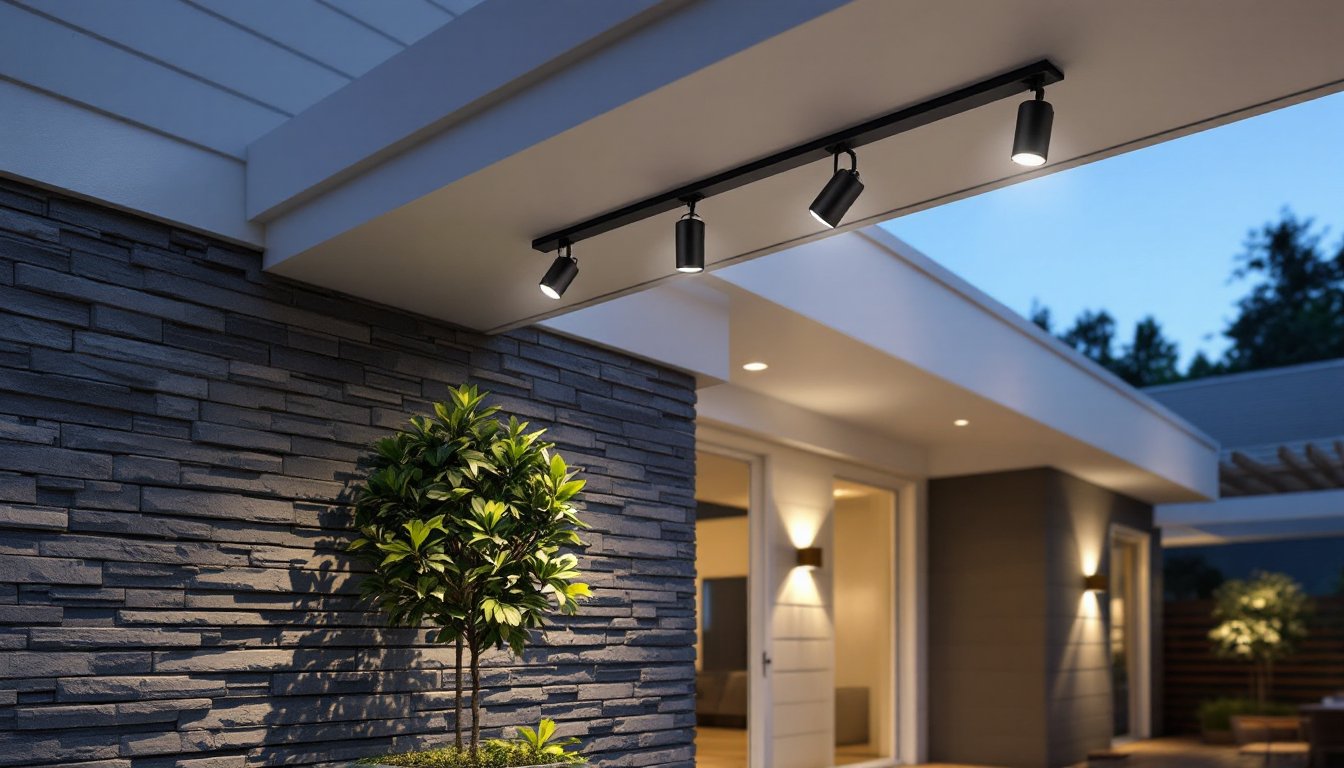
Under eaves and soffits: Mount track parallel to the roofline to wash exterior walls, highlight architectural details, or light up a patio below. Make sure the track is rated for damp or wet locations depending on exposure.
On pergolas and arbors: Run track along beams to spotlight dining areas, seating nooks, or pathways. Adjustable heads let you redirect light as vines grow or furniture shifts.
Along fences and privacy walls: A track mounted horizontally can uplight plantings, graze textured surfaces, or provide security lighting along property lines. Use narrow-beam heads (15–25°) for focused accents and wide floods (40–60°) for general illumination.
Covered patios and outdoor kitchens: Track lighting excels here, aim heads at grills, counters, or conversation areas, then reposition as needed. Pair dimmable heads with a smart switch or photocell for automated control.
Art walls and feature panels: If you’ve invested in outdoor murals, corten-steel panels, or vertical gardens, track lighting with adjustable beam angles makes them pop after dark. Aim for a 30° angle from the wall to minimize glare and enhance texture.
Many creative outdoor lighting ideas use track systems to layer ambient, task, and accent lighting without cluttering the ceiling plane.
How to Choose the Right Outdoor Track Lighting for Your Home
Matching the system to your site and goals prevents buyer’s remorse and return trips to the hardware store.
Voltage and power: For security, large areas, or high ceilings, line-voltage (120V) systems deliver more lumens per head. For accent lighting, energy efficiency, and DIY-friendly installation, go low-voltage (12V or 24V).
Weather rating: Look for fixtures and tracks rated IP65 or higher (dust-tight and protected against water jets). Damp-rated gear works under cover: wet-rated gear handles direct rain and snow. Check the manufacturer’s spec sheet, outdoor track lighting must meet UL 1598 or equivalent standards.
Track length and configuration: Standard sections come in 4 ft and 8 ft lengths with connectors for straight runs, L-joints, and T-joints. Measure your installation area, then add 10% for cuts and joints. Most systems support up to 10–12 heads per 20A circuit, but verify max wattage per track run.
Beam angle and color temperature: Narrow spots (15–25°) work for trees and focal points: medium floods (35–45°) suit walls and pathways: wide floods (50–120°) provide area lighting. Color temperature matters: 3000K offers warm white for living spaces, 4000K neutral white for tasks, and 5000K cool white for security. Some heads accept interchangeable lenses or filters for seasonal flexibility.
Smart controls: Many modern systems integrate with Wi-Fi hubs or low-voltage dimmers. If you plan to automate, confirm compatibility with your home platform (Alexa, Google, HomeKit) before purchasing.
Reviews of the best outdoor smart lights often feature adjustable track heads with app control and scheduling.
Step-by-Step Installation Guide for Outdoor Track Lighting
Safety first: Turn off power at the breaker and verify with a non-contact voltage tester. Wear safety glasses and work gloves. If you’re uncomfortable working with live circuits or if local code requires a licensed electrician, hire one, this is not the place to learn electrical work on the fly.
Tools and Materials
- Track lighting kit (track, heads, connectors, mounting hardware)
- Transformer (for low-voltage systems)
- Weatherproof junction box (if hardwiring)
- Wire nuts, WAGO connectors, or approved splices
- Stud finder (for soffit or wall mounts)
- Drill/driver, masonry bits (if mounting to brick or stucco)
- Level, tape measure, pencil
- Cable staples or conduit (for exposed runs)
- Silicone sealant (for outdoor penetrations)
Installation Steps (Low-Voltage Example)
-
Plan the layout. Mark track centerline on the soffit or wall. Locate studs or blocking: outdoor track needs solid backing every 24–32 inches. If mounting to masonry, use tapcon screws or sleeve anchors rated for outdoor use.
-
Mount the transformer. Position it near a GFCI-protected outlet or hardwire into an existing junction box. Keep the transformer accessible for servicing and out of direct rain. Most transformers include a photocell or timer, wire per the manufacturer’s diagram.
-
Install track sections. Snap or screw the first section to the mounting surface, checking level. Connect additional sections with manufacturer-supplied joiners: tighten screws snugly but don’t overtorque plastic housings. Seal mounting-screw penetrations with a small dab of silicone.
-
Run low-voltage wire. Route 12 AWG or 14 AWG low-voltage cable from the transformer to the track’s power-input port. Use cable staples every 12 inches: avoid sharp bends. If the wire crosses a walkway, run it through Schedule 40 PVC conduit buried at least 6 inches deep (check local code).
-
Connect power to the track. Insert wire ends into the track’s terminal block or quick-connect port. Polarity usually matters, match red to positive, black to negative, or follow labeling. Secure the connection and verify no bare wire is exposed.
-
Attach and aim light heads. Twist or clip each head onto the track, tighten the set screw, then pivot and rotate to aim. Space heads 24–36 inches apart for even coverage, closer for focused accents.
-
Test and adjust. Restore power, check each head, and fine-tune aim. Walk the space at night to verify coverage and eliminate glare.
Line-voltage variation: Hardwiring 120V track requires connecting hot, neutral, and ground wires inside a weatherproof box. Use a GFCI breaker or GFCI receptacle for code compliance, and always run Romex or UF cable per NEC Article 300. If you’re tapping into an existing outdoor circuit, confirm it has capacity (most 15A circuits support up to 1,440W total load).
Permit note: Many jurisdictions require a permit for new 120V outdoor circuits. Check with your local building department before starting.
Maintenance Tips to Keep Your Outdoor Track Lighting Working Perfectly
Outdoor fixtures face UV, moisture, temperature swings, and debris, routine care extends their lifespan and keeps output high.
Clean lenses and reflectors quarterly. Wipe heads with a damp microfiber cloth: for stubborn grime, use a 50/50 mix of water and isopropyl alcohol. Avoid ammonia-based cleaners on polycarbonate lenses, they’ll yellow the plastic.
Inspect seals and gaskets annually. Check where the track meets the mounting surface and where heads attach. Replace cracked or compressed gaskets to maintain weather resistance. Most manufacturers sell gasket kits.
Tighten set screws. Vibration from wind or roof expansion can loosen head-mounting screws. Walk the track twice a year, snugging each screw with an Allen key.
Check transformer and connections. Look for corrosion on low-voltage terminals and verify wire insulation is intact. Replace any wire showing cracks or rodent damage. Keep transformer vents clear of leaves and cobwebs.
Test GFCI protection. Press the test button on your GFCI outlet or breaker monthly. If it doesn’t trip, replace the device, a failed GFCI is a shock hazard.
Replace failed LEDs promptly. Most modern heads use integrated LEDs rated for 25,000–50,000 hours, but failures happen. Mismatched color temperatures and dark zones reduce curb appeal and security, so swap dead heads quickly.
Update firmware on smart systems. If your track integrates with a hub or app, check for firmware updates quarterly. Updates often fix bugs and improve scheduling reliability.
Proper maintenance keeps your system looking sharp and performing like new. For broader lighting ideas and system comparisons, many homeowners reference outdoor lighting buying guides to stay current with product innovations.
Conclusion
Outdoor track lighting gives homeowners flexible, adjustable control over exterior illumination without the cost and complexity of multiple fixed circuits. Whether highlighting architecture, layering patio ambiance, or improving security, track systems adapt as needs evolve. With proper planning, code-compliant installation, and routine maintenance, a well-chosen track system delivers reliable performance and curb appeal for years.


