Table of Contents
ToggleMid century pendant lighting brings an instant hit of retro charm without the dated feel. These fixtures marry form and function in ways few other design styles manage, clean lines, warm materials, and sculptural shapes that look just as sharp today as they did in 1958. Whether you’re restoring a ranch house to its original glory or adding a vintage accent to a contemporary kitchen, mid century pendants deliver. They’re not just decorative: they’re workhorses that provide focused task lighting or ambient glow, depending on placement and bulb choice. This guide walks through what makes these fixtures tick, where to hang them, how to choose the right one, and how to install it yourself (or when to call in help).
Key Takeaways
- Mid century pendant lighting combines clean lines, sculptural shapes, and warm materials to deliver both focused task lighting and ambient glow for any room in your home.
- Hang kitchen pendants 30–36 inches above countertops and dining pendants 28–34 inches above table surfaces to optimize lighting while maintaining clear sightlines.
- Choose LED bulbs in warm white (2700K–3000K) and verify dimmable compatibility to preserve the vintage warmth and functionality of your mid century fixtures.
- Match pendant finishes to existing hardware—brushed brass complements wood cabinetry, while polished chrome ties in with stainless steel appliances—for a cohesive design.
- Most mid century pendant installations require a weight-rated junction box and proper wire connections; hire a licensed electrician if you’re unfamiliar with electrical work or local permit requirements.
- Layer mid century pendant lighting with complementary furniture and neutral walls to create focal points that define zones and maintain the era’s emphasis on clean, uncluttered design.
What Defines Mid Century Modern Pendant Lighting?
Mid century modern pendant lighting refers to fixtures designed (or inspired by designs) from roughly 1945 to 1970. The hallmarks are unmistakable: geometric shapes (globes, cones, cylinders), exposed materials (brushed brass, walnut, spun aluminum, frosted glass), and minimal ornamentation. Unlike Victorian chandeliers or industrial cage lights, mid century pendants rely on the interplay of material and form rather than embellishment.
Common design elements include:
- Sputnik or starburst configurations: multiple arms radiating from a central hub, often with small globe bulbs at each tip.
- Dome or bell shades: typically metal with an enamel or powder-coat finish in mustard yellow, avocado green, or classic white.
- Wood and metal hybrids: teak or walnut accents paired with brass or steel hardware.
- Glass globes: opal or smoke-tinted glass in spherical or teardrop shapes, sometimes suspended by a single cord or rod.
Authentic vintage pieces can be sourced from estate sales, architectural salvage yards, or online marketplaces. Reproductions from contemporary manufacturers offer the same aesthetic with updated wiring that meets current NEC (National Electrical Code) standards, a critical consideration if you’re rewiring or adding new fixtures. Vintage fixtures may need rewiring: if the cord insulation is cracked or the socket is corroded, replacement is non-negotiable for safety.
Materials matter. Brass develops a patina over time unless lacquered: some homeowners prefer the aged look, while others polish regularly. Powder-coated steel resists chipping better than enamel paint. Walnut and teak veneers add warmth but require occasional oiling to prevent drying and cracking, especially in dry climates.
Where to Use Mid Century Pendant Lights in Your Home
Kitchen and Dining Areas
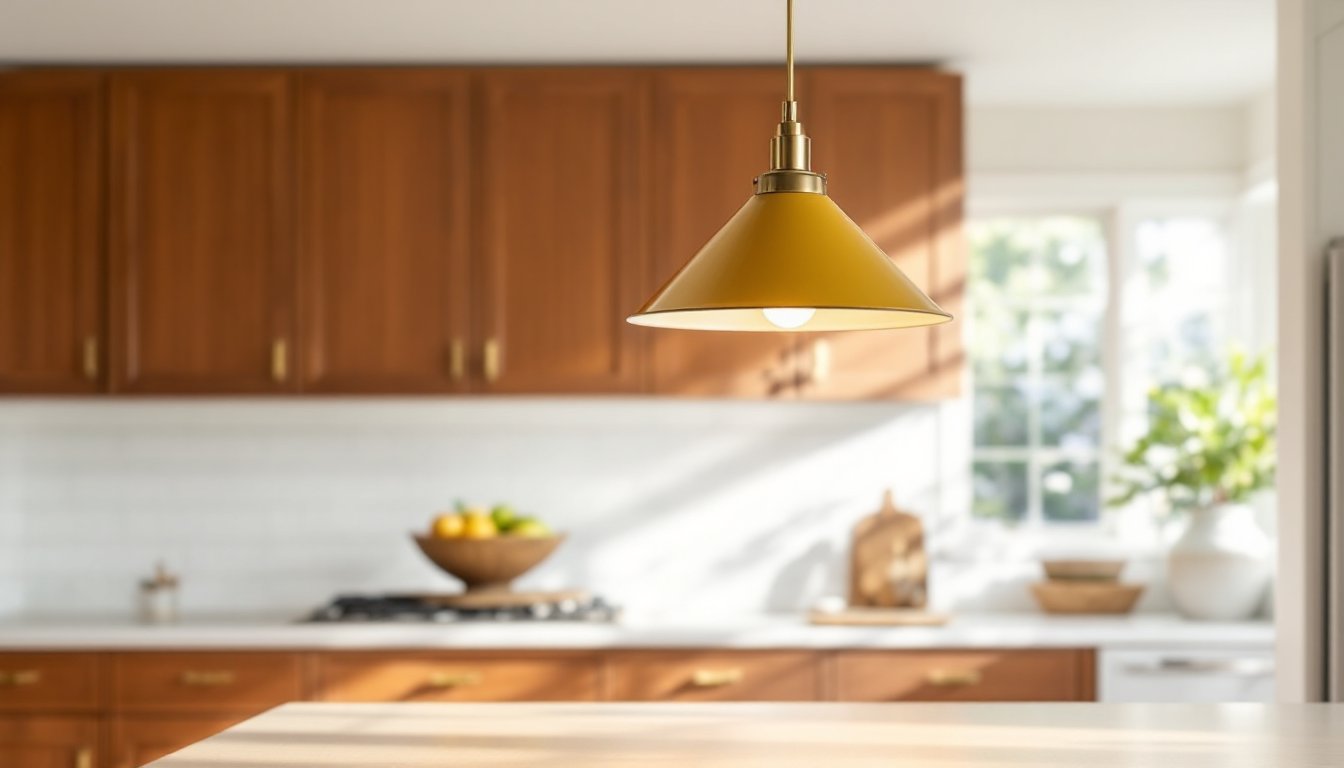
Kitchens and dining rooms are the natural habitat for mid century pendant lighting. Over an island or peninsula, hang pendants 30 to 36 inches above the countertop to avoid head-bumping while maintaining task lighting. For a standard 36-inch-high counter, that puts the bottom of the fixture around 66 to 72 inches from the floor, comfortable for most users.
Over a dining table, aim for 28 to 34 inches of clearance between the table surface and the bottom of the pendant. This range keeps the light source low enough to illuminate food and faces without glare, while leaving sightlines open across the table. For a 60-inch round or rectangular table, a single large pendant (18 to 24 inches in diameter) works well, or use a pair of smaller pendants spaced evenly.
Choose fixtures with downward-focused shades for task lighting, metal domes or bell shapes direct light onto work surfaces. If you prefer ambient lighting, opt for globe or lantern styles that diffuse light in all directions. Dimmer switches (compatible with LED or incandescent bulbs) let you shift from bright task mode during meal prep to softer ambiance during dinner. Verify the fixture is rated for damp locations if it’s near a sink or range.
Living Rooms and Entryways
Living rooms and entryways benefit from mid century pendant lighting used as accent or ambient fixtures rather than primary task lights. In a living room with high ceilings (10 feet or more), a Sputnik chandelier or clustered globe pendant becomes a sculptural focal point. Hang it over a coffee table or seating area, maintaining at least 7 feet of clearance from the floor to the lowest point of the fixture to meet most building codes and avoid head strikes.
In entryways or foyers, a single statement pendant sets the tone. If the entry has a two-story ceiling, scale up, fixtures that look oversized in a showroom often read just right in a tall space. For standard 8- to 9-foot ceilings, choose compact designs (12 to 16 inches in diameter) to avoid overwhelming the space.
Pair pendants with floor lamps or table lamps to layer lighting. Mid century design thrives on variety: a brass arc lamp next to a sofa complements a walnut and glass pendant overhead. Avoid centering every fixture in the middle of the room: off-center placement over a reading nook or side table adds visual interest and breaks up symmetry, which aligns with the era’s informal, livable aesthetic.
Choosing the Right Mid Century Pendant for Your Space
Start with ceiling height and room proportions. A pendant that’s too large dominates a small room: one that’s too small disappears in a large space. A general rule: measure the room’s length and width in feet, add them together, and convert that sum to inches for a recommended fixture diameter. A 12-foot by 14-foot room (12 + 14 = 26) suggests a pendant around 26 inches wide. Adjust down for clustered fixtures or up for especially tall ceilings.
Consider finish and material in relation to existing elements. If you have stainless steel appliances and chrome cabinet pulls, brushed nickel or polished chrome pendants tie in seamlessly. Warm brass or copper complements wood cabinetry and butcher-block counters. Painted metal in period colors (burnt orange, chartreuse, matte black) adds a pop but should echo accent colors elsewhere, throw pillows, artwork, or backsplash tile.
Bulb compatibility affects both function and aesthetics. Many mid century pendants were designed for incandescent bulbs, which cast a warm, slightly yellow light. Modern LED bulbs (measured in Kelvin) range from warm white (2700K–3000K) to cool daylight (5000K+). Stick with 2700K–3000K to preserve the fixture’s vintage warmth. Check whether the socket is E26 (standard medium base) or E12 (candelabra): some Sputnik fixtures use the smaller candelabra base.
Dimmer compatibility varies. Not all LED bulbs dim smoothly: look for bulbs labeled “dimmable” and pair them with an LED-compatible dimmer switch. Incompatible pairings cause flickering or buzzing. If you’re using vintage fixtures with rewired sockets, confirm the dimmer’s wattage rating matches your bulb load.
For multi-pendant installations, odd numbers (three over an island, five over a bar) create balanced asymmetry that feels organic. Keep spacing proportional: pendants spaced 24 to 30 inches apart over a long island avoid both crowding and gaps. Many manufacturers offer matching vintage pendants that simplify coordination.
Installing Mid Century Pendant Lighting: DIY Tips and Considerations
Shut off power at the breaker before touching any wiring. Use a non-contact voltage tester to confirm the circuit is dead, this is non-negotiable. Most pendant installations replace an existing ceiling fixture, so you’ll have a junction box already in place. Verify the box is rated to support the fixture’s weight. Standard plastic boxes hold up to 50 pounds: heavier pendants (Sputnik chandeliers, large glass globes) require a metal fan-rated box or a support brace installed between ceiling joists.
If the existing box is off-center or you’re adding a new pendant where none existed, you’ll need to install a new junction box. This involves cutting drywall, running 14/2 or 12/2 NM cable (depending on circuit amperage), and securing the box to a joist or ceiling brace. This is a job for someone comfortable with basic electrical work: if you’re uncertain, hire a licensed electrician. Many jurisdictions require a permit for new circuits or junction box installations.
Wiring the fixture:
- Thread the pendant’s cord or rod through the canopy and any decorative collars.
- Strip about 1/2 inch of insulation from the fixture’s black (hot) and white (neutral) wires.
- Connect black to black, white to white, and green or bare copper (ground) to the box’s ground screw using wire nuts. Twist wires clockwise before threading the nut on, then tug gently to confirm a solid connection.
- Tuck wires into the junction box neatly. Overstuffing causes heat buildup and can trip breakers.
- Secure the canopy to the mounting bracket with screws. Most pendants use a crossbar or strap that screws into threaded holes in the junction box.
Adjust the cord or rod length before final installation. Many pendants ship with excess cord: you can shorten it by cutting and re-stripping (if you’re comfortable with wiring) or by looping and securing the excess inside the canopy. Some fixtures use a threaded rod that unscrews in sections for custom height.
Safety gear: wear safety glasses when working overhead (drywall dust and debris fall), and use a sturdy ladder or scaffolding. A second person is helpful for holding the fixture while you wire it, especially for heavy or awkwardly shaped pendants.
If you’re installing multiple pendants on a single circuit, calculate total wattage. A 15-amp circuit (14-gauge wire) supports up to 1800 watts: a 20-amp circuit (12-gauge) supports 2400 watts. Three pendants with 100-watt-equivalent LED bulbs (actual draw around 15 watts each) total only 45 watts, well within limits. But vintage incandescent bulbs at 60–100 watts each add up quickly.
Styling Tips to Complement Your Mid Century Pendant Fixtures
Mid century pendant lighting shines brightest (pun intended) when the surrounding space echoes the era’s principles. Pair pendants with low-profile furniture, think platform beds, sleek credenzas, and tapered-leg chairs, to maintain the horizontal emphasis mid century designers favored. Avoid heavy drapes and fussy window treatments: opt for simple roller shades or wood blinds that let natural light flood in.
Color and texture: mid century interiors balanced warm wood tones with bold accent colors. A walnut pendant over a dining table pairs beautifully with teak chairs and a burnt orange rug. Brass fixtures complement jewel tones like emerald or sapphire in throw pillows or wall art. Keep walls neutral (white, gray, soft taupe) to let the fixture and furniture stand out, or go bold with a single accent wall in a period-appropriate hue.
Incorporate vintage accessories sparingly. A sunburst mirror, ceramic table lamp, or molded plywood chair reinforces the aesthetic without tipping into theme-park territory. Design-forward spaces often layer mid century pieces with contemporary art and textiles to avoid a time-capsule feel.
Avoid mismatched metals unless you’re intentionally mixing finishes. If your pendant is brushed brass, echo that warmth in cabinet hardware, faucet finishes, or picture frames. Mixing warm brass with cool chrome can clash unless you introduce a third transitional metal (like oil-rubbed bronze) to bridge the gap.
For open-plan spaces, use mid century pendant lighting to define zones. A trio of pendants over a kitchen island signals the cooking zone, while a floor lamp and pendant combo in the living area marks the relaxation zone. Consistent design language (matching finishes, complementary shapes) ties the zones together without rigid boundaries.
Finally, don’t overcrowd. Mid century design celebrates negative space. If you’ve installed a statement pendant, let it breathe. Resist the urge to fill every surface: a single well-chosen fixture, a clean countertop, and a few curated objects often make a stronger impact than a cluttered display. Thoughtful styling choices ensure the lighting remains the hero, not an afterthought.


