Table of Contents
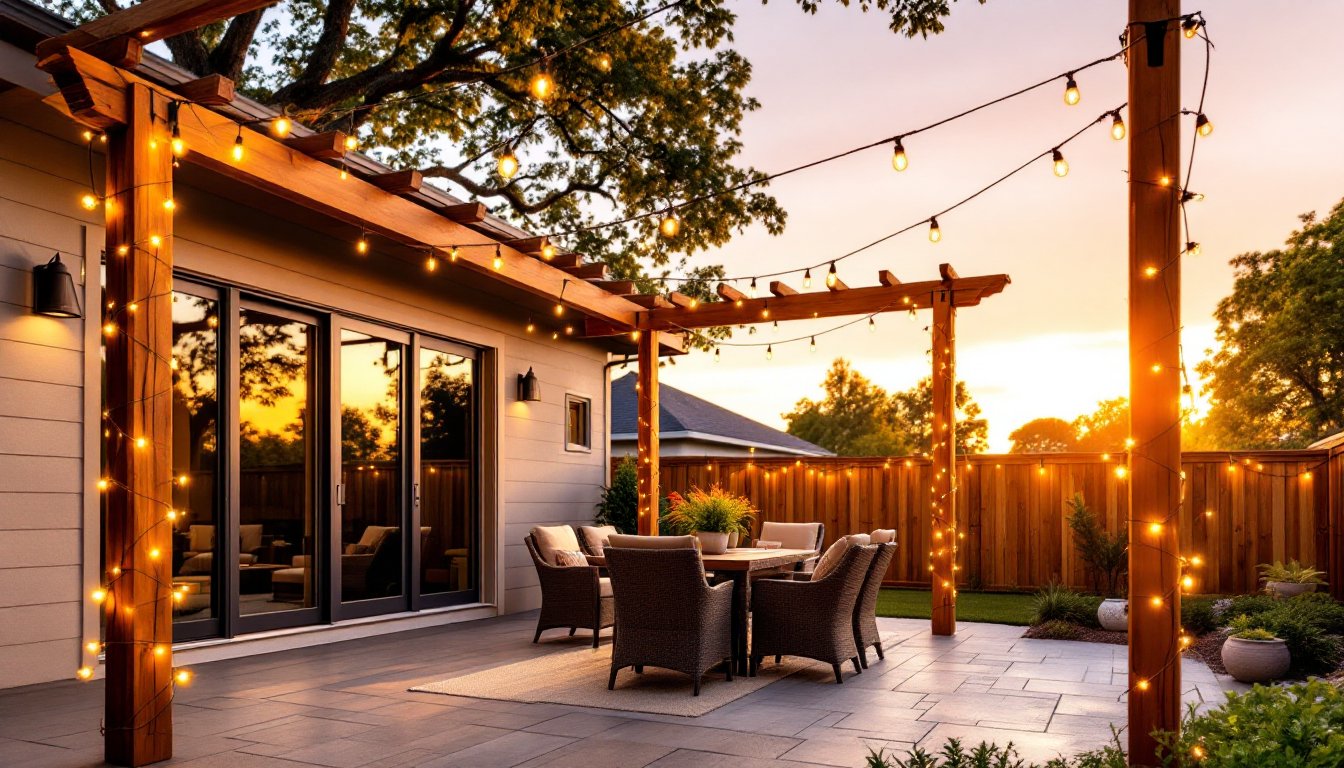
ToggleThere’s something undeniably inviting about a backyard lit by warm, glowing string lights. They extend usable hours into the evening, create ambiance without heavy infrastructure, and add value to outdoor living spaces. Whether draped over a patio, wrapped around pergola beams, or zigzagged across a deck, outdoor string lighting changes the entire feel of a yard. The good news? Installing them is a manageable DIY project for most homeowners, no electrician required in many cases. This guide walks through everything needed to choose, plan, and install outdoor string lights that look professional and hold up to the elements.
Key Takeaways
- Outdoor string lighting extends your yard’s usable hours into the evening while adding architectural interest and property value with minimal investment compared to hardwired landscape lighting.
- Choose between Edison bulbs for bistro vibes, globe lights for casual ambiance, or fairy lights for decorative accents based on your desired aesthetic and lighting needs.
- LED and solar-powered string light options offer superior energy efficiency, with LEDs drawing 80-90% less power than incandescent bulbs and lasting 25,000+ hours.
- Proper planning involves measuring your space, sketching your layout, calculating run length with 10% added for sag, and identifying sturdy anchor points before installation.
- Installation requires GFCI-protected outlets, appropriate anchors for your surface (wood screws, masonry anchors, or siding hooks), and a stable ladder—guide wire is essential for spans over 15 feet.
- Create visual impact by layering outdoor string lighting with complementary light sources like path lights or uplighting, and adjust brightness and colors seasonally for year-round appeal.
Why Outdoor String Lights Are a Game-Changer for Your Home
Outdoor string lights deliver impact with minimal investment. Unlike hardwired landscape lighting that requires trenching and electrical boxes, most string light setups plug into a standard GFCI outlet and hang from existing structures.
They’re functional first. A well-lit deck or patio means dinner parties don’t end at sunset, and kids can play outside longer. Ambient lighting also improves safety by illuminating steps, pathways, and uneven terrain without the harshness of floodlights.
From a design standpoint, string lights add architectural interest. They define zones, like separating a dining area from a fire pit, and draw the eye upward, making small yards feel larger. They also complement nearly every home style, from modern minimalist to farmhouse rustic.
Real estate agents often recommend them as a low-cost upgrade that photographs well and appeals to buyers looking for move-in-ready outdoor living spaces. A $200 lighting setup can make a backyard look like it cost thousands more.
Types of Outdoor String Lights: Finding the Perfect Match for Your Space
Edison Bulbs vs. Globe Lights vs. Fairy Lights
Edison bulbs (also called café lights) use vintage-style filament bulbs in clear or smoked glass. They cast warm, focused light and work best over dining areas or seating zones where task lighting matters. Bulb spacing typically runs 12 to 24 inches apart on commercial-grade strands. They’re heavier than other options, so support points need to handle the weight, especially when wet.
Globe lights feature round, opaque bulbs (usually plastic) in white, frosted, or colored finishes. They diffuse light more evenly than Edison bulbs and feel more casual. Globe diameters range from 1 to 3 inches: larger globes provide more light but require sturdier mounting. They’re a solid choice for wrapping around railings or trees.
Fairy lights (or micro-LEDs) use tiny bulbs on thin, flexible wire. They’re purely decorative, don’t expect meaningful illumination. Best used for accenting planters, trellises, or wrapping columns. They’re lightweight and easy to shape but lack the presence of larger bulbs.
Match bulb style to the vibe: Edison for bistro or industrial looks, globes for playful or tropical themes, fairy lights for romantic or whimsical accents.
Solar-Powered and LED Options for Energy Efficiency
LED string lights are the standard now. They draw 80-90% less power than incandescent equivalents, run cooler (reducing fire risk), and last 25,000+ hours. Most outdoor-rated LED strands can connect end-to-end, check the manufacturer’s max run, usually 3 to 5 strands depending on wattage.
Solar-powered options eliminate outlet dependency. A small photovoltaic panel charges a battery during the day: lights turn on automatically at dusk. They work well for areas far from power sources, like gardens or fence lines. Drawbacks: dimmer output than plug-in LEDs, shorter runtime (typically 6-8 hours), and inconsistent performance in shaded yards or cloudy climates. Some models include manual override switches.
For patios near the house, plug-in LEDs offer better brightness and reliability. Save solar for accent lighting or secondary zones. Either way, verify the IP rating, look for IP65 or higher for weather resistance (dust-tight and protected against water jets).
Planning Your Outdoor String Lighting Layout
Measure twice, hang once. Start by sketching the yard to scale on graph paper or using a phone app. Mark existing structures, pergolas, posts, trees, eaves, and note outlet locations.
Decide on a lighting pattern: parallel runs create clean, modern lines: crisscross or zigzag patterns add visual interest: perimeter lighting defines boundaries. Mix patterns if the space has multiple zones, but keep it consistent within each area.
Calculate total run length by measuring between anchor points and adding 10% for sag and connections. Most patios need lights hung every 8 to 12 feet for even coverage. Too tight looks cluttered: too sparse leaves dark pockets.
Identify support points. Ideally, attach to structural wood (fascia boards, pergola beams, fence posts) or masonry. Avoid siding unless using specialized hooks rated for exterior cladding. For spans longer than 15 feet without mid-supports, plan for a guide wire or suspension cable, string lights alone will sag excessively.
Check electrical capacity. A standard 15-amp outdoor circuit can handle around 1,800 watts. LED strands typically draw 5-15 watts per bulb: do the math to avoid tripping breakers. If the nearest outlet is more than 100 feet away, consider hiring an electrician to install a new GFCI receptacle closer to the lighting zone, it’s safer than daisy-chaining extension cords.
Confirm that all outlets are GFCI-protected (required by NEC for outdoor receptacles). If not, replace the outlet or install a GFCI breaker in the panel. This is non-negotiable for safety.
How to Install Outdoor String Lights: A Step-by-Step Guide
Tools & Materials:
- Outdoor-rated string lights (appropriate length and bulb style)
- Measuring tape
- Ladder (tall enough to reach mounting points safely)
- Screw hooks, eye bolts, or cable clips (material-specific: wood screws for posts, masonry anchors for brick/stucco)
- Drill with bits (if pre-drilling required)
- Guy wire or galvanized steel cable (for spans over 15 feet)
- Cable tensioners or turnbuckles (if using guide wire)
- Zip ties or cable ties (optional, for securing lights to wire)
- Safety goggles and work gloves
Step-by-Step Installation:
-
Test the lights. Unbox and plug in the entire strand before mounting. Check for dead bulbs or faulty sockets. Most quality strands have replaceable bulbs, swap any duds now.
-
Mark mounting points. Using your layout plan, mark where each hook or anchor will go. Use a level or chalk line to keep runs straight. For posts or beams, locate solid wood, not trim or thin fascia that might pull out.
-
Install anchors. For wood: Pre-drill pilot holes slightly smaller than the screw shank, then twist in screw hooks or eye bolts by hand (use pliers on the last few turns for a tight fit). For masonry: Use a hammer drill with a masonry bit, insert plastic or metal anchors, then thread in eye bolts. For vinyl or aluminum siding: Use siding hooks rated for outdoor use (they slip under the lip without penetration).
-
Run guide wire (if needed). For long spans, string galvanized steel cable (1/16″ or 1/8″ diameter) between anchors first. Attach with eye bolts and tighten using a turnbuckle or cable tensioner until the wire is taut but not over-tensioned (wood can crack). This carries the weight, not the light strand.
-
Hang the lights. Start at the outlet end and work outward. Drape the strand from hook to hook, allowing a 2- to 6-inch sag (catenary curve) between supports, this looks intentional and prevents tension damage during wind or temperature swings. If using guide wire, secure the light strand to the cable every 12-18 inches with zip ties.
-
Secure connections. Where strands connect end-to-end, wrap the plug junction with electrical tape or use a weatherproof cover to prevent moisture intrusion. Keep connections accessible, not buried inside bushes or wrapped around posts.
-
Plug in and adjust. Connect to the GFCI outlet. Walk the perimeter and fine-tune sag and spacing. Adjust hooks if any section looks uneven.
-
Consider a timer or smart plug. Automate on/off times to save energy and extend bulb life. Many outdoor-rated smart plugs integrate with voice assistants and offer scheduling.
Safety notes: Always use a stable ladder with a helper spotting. Never work near power lines. If drilling into brick or stucco, wear safety goggles and a dust mask. Don’t overload circuits or use indoor-rated extension cords outdoors.
Creative Design Ideas for Every Outdoor Area
Patios and decks: Run parallel lines overhead for a clean canopy effect, or create a grid pattern for even coverage. Combine with a dimmer-compatible LED strand to adjust brightness for dining versus late-night conversation.
Pergolas and gazebos: Wrap beams or drape lights diagonally from corner posts to a center point (like a tent ceiling). This emphasizes architectural features and concentrates light where people gather.
Fence lines and privacy screens: Hang lights along the top rail to define property edges and boost security lighting. Stagger heights slightly for a less rigid look. Pairing string lights with strategic outdoor lighting design can enhance both function and curb appeal.
Trees and landscaping: Wrap trunks sparingly with fairy lights or hang globe strands between mature trees. Always use hooks or tree-friendly straps, never nail or screw into bark. For creative hanging techniques and seasonal ideas, check out expert tips on arranging outdoor string lights for maximum impact.
Poolside and water features: Use only lights rated for wet locations (IP67 or IP68) near pools or fountains. Mount higher and aim away from water to reduce glare on the surface.
Seasonal swaps: Switch bulb colors or add clip-on shades for holidays. Many LED strands accept interchangeable bulbs, making it easy to go from warm white year-round to amber for fall or multicolor for celebrations.
Layering light sources: Don’t rely solely on string lights. Mix in solar path lights, lanterns, or uplighting on plantings for depth and functionality. String lights set the mood: task lighting fills in the gaps.


