Table of Contents
ToggleContemporary outdoor lighting does more than just illuminate, it redefines curb appeal, extends living spaces into the evening, and anchors architectural lines with intentional design. Unlike traditional lanterns or Victorian post lights, contemporary fixtures lean toward clean geometry, minimalist profiles, and honest materials like brushed aluminum, powder-coated steel, and frosted glass. They’re built to complement modern and transitional architecture, but they work surprisingly well on mid-century ranches, Craftsman bungalows, and even updated colonials where homeowners want a cleaner aesthetic. The right outdoor lighting plan balances function, safety, and visual drama without overcomplicating the install.
Key Takeaways
- Contemporary outdoor lighting prioritizes clean geometry, minimalist profiles, and weather-resistant materials like brushed aluminum and powder-coated steel over ornamental designs, complementing modern and traditional architecture alike.
- Integrated LED technology with 50,000+ hour lifespans, dimming capability, and smart home compatibility is now standard in contemporary fixtures, offering both energy efficiency and aesthetic flexibility.
- Strategic placement—flank entryways at 60–66 inches, space path lights 8–12 feet apart, and layer outdoor living spaces with ambient, task, and accent lighting to maximize both functionality and visual impact.
- Proper IP ratings and UL wet/damp location listings are essential; wet-rated fixtures handle direct weather while damp-rated fixtures suit covered areas, preventing corrosion and maintenance issues.
- Outdoor electrical installations require GFCI protection, weatherproof junction boxes, proper mounting heights, and often professional licensing and permits—skipping these steps risks safety hazards and code violations.
- Matching finish, scale, and color temperature across fixtures and existing hardware creates an intentional design; aim for 600–900 lumens at 2700–3000K for entryways and warm 2700K tones for residential landscapes.
What Defines Contemporary Outdoor Lighting?
Contemporary outdoor lighting strips away ornament in favor of form that follows function. You won’t find scrollwork, faux candelabras, or heavy patina finishes. Instead, expect geometric silhouettes, squares, rectangles, cylinders, and clean spheres, often in matte black, brushed nickel, graphite gray, or white powder coat.
Material choices lean durable and weather-resistant: marine-grade aluminum, stainless steel, tempered glass, and UV-stabilized polycarbonate. These hold up against rain, salt air, and UV exposure better than brass or painted iron, which can pit or corrode without regular maintenance.
Integrated LED technology is standard in 2026. Most contemporary fixtures ship with LED arrays or modules rather than replaceable bulbs, offering 50,000+ hour lifespans, lower heat output, and color temperatures ranging from warm white (2700K) to cool daylight (4000K+). Many now include dimming capability and compatibility with smart home systems like Lutron Caséta, Philips Hue, or Control4.
Another hallmark: downward or shielded light distribution. Dark-sky compliant designs reduce light pollution and glare, focusing illumination where it’s needed, on walkways, steps, or architectural features, rather than washing out into neighbors’ yards or up into the night sky.
Popular Contemporary Outdoor Lighting Styles for 2026
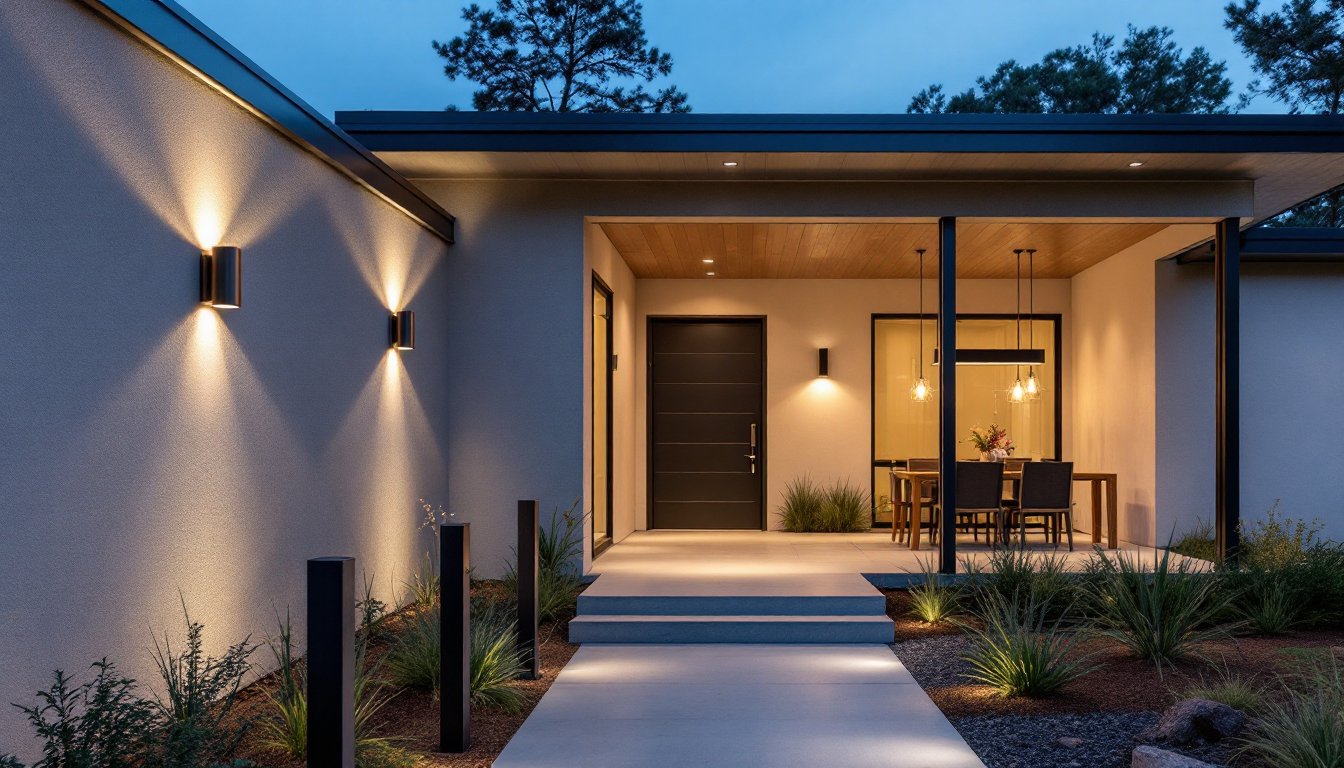
Wall sconces with horizontal bands dominate entryways and garage facades. These low-profile fixtures project light up and down through slim apertures, creating dramatic grazing effects on siding, brick, or stucco. Look for models with frosted acrylic diffusers to soften the LED point source and avoid harsh glare.
Cylindrical pendant lights work well over outdoor dining tables, kitchen islands on covered patios, and beneath deep eaves. Hang them at least 30 inches above table surfaces to keep sight lines clear and prevent head bumps. Choose weatherproof cord or chain rated for wet locations (UL listing).
Bollard lights (short post-style fixtures, typically 18–36 inches tall) line pathways, driveways, and pool decks. Contemporary versions feature sleek metal housings and integrated LEDs that cast controlled pools of light without spilling upward. Space them 8–12 feet apart along walkways for even coverage.
Recessed step lights and strip lighting are increasingly popular on deck stairs, retaining walls, and outdoor kitchens. Low-voltage (12V) or line-voltage (120V) options install flush with surfaces, minimizing trip hazards while highlighting elevation changes. Pairing these with inspiration from garden design experts can help homeowners plan cohesive outdoor spaces that balance hardscape and lighting.
Linear suspension fixtures mounted to pergola beams or patio overhangs create floating ribbons of light, ideal for modern outdoor living rooms where traditional pendants feel too formal.
Best Placement Ideas for Maximum Impact
Strategic placement turns functional lighting into intentional design. Here’s where contemporary fixtures earn their keep.
Entryways and Front Porches
Flank the front door with matching wall sconces mounted at 60–66 inches above the threshold (eye level, centered on the door or offset on either side). On modern homes with oversized pivot doors or sidelights, consider larger sconces (12–18 inches tall) to maintain proportion.
If the porch has a high ceiling, a flush-mount or semi-flush ceiling fixture rated for wet locations keeps the look streamlined. For covered entries with minimal overhang, choose damp-rated fixtures: fully exposed locations require wet-rated hardware.
Path lighting along the walkway should start within 3–4 feet of the street and continue to the entry steps, spaced at regular intervals. Use fixtures with downward-facing shields to prevent glare from hitting drivers or pedestrians at street level. Complement these choices with broader thinking about fixture styles and function to ensure consistency across your home’s exterior and interior.
Patios, Decks, and Outdoor Living Spaces
Outdoor living spaces benefit from layered lighting: ambient (overhead or perimeter), task (over grills, bars, or dining tables), and accent (highlighting plants, water features, or architectural details).
Mount overhead pendants or linear fixtures on pergola beams, using adjustable-height cables to account for clearance and wind sway. Ensure they’re on a dedicated dimmer circuit so you can shift from bright task lighting during meal prep to soft ambient glow for conversation.
Install recessed deck lights or in-rail LED strips along stair nosings and perimeter railings. These should be on a separate switch from overhead fixtures to provide safe navigation without over-illuminating the entire deck.
For covered patios with ceiling fans, look for fan-light combos rated for damp or wet locations with integrated LED downlights, simpler wiring and cleaner aesthetics than separate fixture installs. Western homeowners often draw ideas from resources focused on outdoor living and regional design, which emphasize climate-appropriate materials and year-round usability.
Choosing the Right Fixtures for Your Home
Start with your home’s architectural style. Clean-lined contemporary fixtures complement modern farmhouse, mid-century, and minimalist builds, but they can also update traditional styles when chosen thoughtfully. A matte black cylindrical sconce works on both a steel-sided modern build and a white clapboard colonial where homeowners want to tone down formality.
Match finish and scale to existing hardware, entry door handles, house numbers, mailbox, garage door pulls. If your hardware skews industrial (oil-rubbed bronze, matte black), avoid brushed nickel fixtures. Consistency reads as intentional: mismatched metals read as afterthought.
Check the IP (Ingress Protection) rating and UL wet/damp location listing. Wet-rated fixtures can handle direct rain, snow, and hose spray, necessary for wall sconces, ceiling mounts without overhangs, and bollards in open yards. Damp-rated fixtures tolerate humidity and indirect moisture (covered porches, soffits) but shouldn’t face direct weather.
Pay attention to lumen output and color temperature. For entryways and task areas, aim for 600–900 lumens per fixture at 2700–3000K (warm white). Path lights can drop to 100–200 lumens per bollard. Cooler temperatures (3500K+) work well in modern, industrial settings but can feel sterile in residential landscapes.
Smart integration is worth considering if you’re already using a home automation platform. Fixtures with built-in dimming and scheduling let you automate dusk-to-dawn routines, adjust brightness seasonally, and integrate motion sensing for security. Understanding the nuances of different lighting approaches can help homeowners choose fixtures that align with their functional needs and aesthetic goals.
Installation Tips and DIY Considerations
Safety first: Turn off power at the breaker before touching any electrical work. Use a non-contact voltage tester to confirm circuits are dead. Outdoor electrical work falls under NEC (National Electrical Code) Article 410 for luminaires and Article 590 for temporary and outdoor wiring. Some jurisdictions require permits for new outdoor circuits or fixture swaps involving new junction boxes.
Mounting height and clearance matter. Wall sconces should sit high enough that they don’t interfere with door swings or furniture but low enough to cast useful light, 60–72 inches is a safe range. Step lights and recessed fixtures need backing (solid framing or blocking) behind siding or decking to anchor securely.
For low-voltage systems (12V or 24V), you’ll need a transformer, typically mounted in a garage, basement, or weatherproof enclosure near the outdoor fixtures. Size the transformer to handle total wattage plus 20% overhead, if you’re running eight 5-watt LED path lights, choose a transformer rated for at least 50 watts. Use direct-burial cable rated for wet locations (UF-B or low-voltage landscape wire) and bury it at least 6 inches deep (12 inches if not in conduit) per local code.
Line-voltage (120V) installs require GFCI protection on outdoor circuits, either at the breaker or via GFCI-protected outlets feeding the fixtures. All wire splices must be made in weatherproof junction boxes with appropriate wire nuts or Wago connectors, never buried or exposed. If you’re running new circuits or installing fixtures in locations without existing boxes, hire a licensed electrician, permits and inspections are non-negotiable in most areas.
PPE: Wear safety glasses when drilling into masonry, siding, or wood. Use work gloves when handling fixtures with sharp edges. If you’re working on a ladder near the roofline at dusk, wear a headlamp and have a helper stabilize the base.
Tool alternatives: A cordless drill with masonry bits handles most mounting tasks, but a hammer drill makes quicker work of brick or stucco anchors. A wire stripper is essential: don’t use pliers or a knife. A fish tape helps pull cable through walls or conduit runs, though in simple retrofit jobs you can sometimes skip it.
Test all fixtures before finishing the install. Mount them temporarily, restore power, and verify operation, dimming, and sensor response (if equipped). This saves you from reopening walls or removing siding if a fixture arrives DOA.
For homeowners seeking a refined look with premium materials and finishes, exploring upscale fixture options can elevate both the exterior aesthetic and long-term durability. Design galleries showcasing modern outdoor installations offer practical examples of fixture placement, scale, and material pairings in real-world projects.


